Choose the Best Free or Paid Blogging Platform for You
If you have read the articles about blog design, you should know how to change the look of your blog using CSS so your blog looks different and unique. One last thing you might want to do is add your logo or header graphics into your blog.
If you don’t have your own header graphics, you can read about free software that will enable you to create graphics for your site or blog in the article about background image design.
Your own stylish web graphics can make a big difference for you. First your blog readers will be comfortable with your blog and might visit your blog more often just because it has a great look. Second, professional graphics add a sense of professionalism to your blog and if you promote anything, customer will feel more comfortable ordering from you.
Adding a Header Graphic to Your Blog
The first thing people notice when they visit a website is the logo or header graphic on your site or blog. So making your blog unique is crucial if you want visitors to remember your blog and revisit it again in the near future. But how do you add a graphic to your blog?
For designing blog you should use blog software, like WordPress. It is much more flexible in terms of customization than any blog service.
If you have read an article about designing a blog, then you should already have a copy of “default” themes folder named “custom”. Now go to your “custom” folder in:
Blog > Wp-content > Themes
In the “custom” directory, open a file called “header.php”. In that file between this line:
<link rel="pingback" href="<?php bloginfo('pingback_url'); ?>" />
and this line:
<?php wp_head(); ?>

add the following code below:

<style type="text/css" media="screen">

#header {
background: url("<?php bloginfo('stylesheet_directory'); ?>/images/logo.gif") no-repeat bottom center;
}

</style>
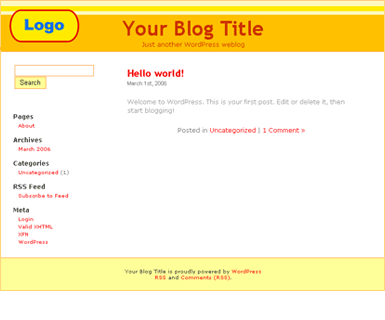
And save the header file. Instead of “logo.gif” there should be your created background image. Your image should be 760 pixels in width and 100 pixels in height. You can create an image that has your logo on the left side, like this one below:


After you create it, save it as “logo” in gif or jpeg format and put it into the:
Blog > Wp-content > Themes > Custom > Images
Now all you need to do is upload the image and the header.php files into your server. Go to see your blog. It should look like this:


However, you might want to get rid of the title and description of your blog. In that case, open the header.php file in your custom folder. You’ll see this line:
<div id="header">
 <div id="headerimg">
 <h1><a href="<?php echo get_settings('home'); ?>/"><?php bloginfo('name'); ?></a></h1>
 <div class="description"><?php bloginfo('description'); ?></div>
 </div>
 </div>
 <hr />
Now change all that into the code below:
<div id="header">
 <div id="headerimg">
 <h1><a href="<?php echo get_settings('home'); ?>/"></a></h1>
 <div class="description"></div>
 </div>
 </div>
 <hr />
By doing this you simply remove the title and description text (along with a link) from your header.
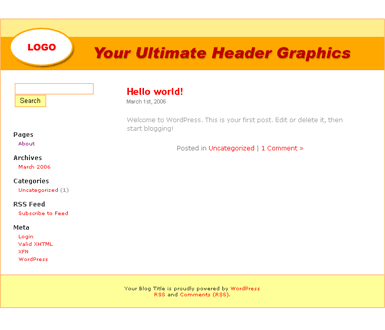
Now you may even include your own words in the header graphics, so it looks something like this:


However, there’s one thing you might not like. The header is not clickable. So if a visitor wants to easily jump back to your main page by clicking a header image, he cannot do that.
But there’s an easy solution to that. Go to your header.php file and find this line:
<div id="header">
 <div id="headerimg">
 <h1><a href="<?php echo get_settings('home'); ?>/"><?php bloginfo('name'); ?></a></h1>
 <div class="description"><?php bloginfo('description'); ?></div>
 </div>
 </div>
 <hr />
Change the above piece of text with the one below:
<div id="header" onclick="location.href='http://yourblog.com';" style="cursor: pointer;">
 <div id="headerimg">
 <h1><a href="<?php echo get_settings('home'); ?>/"></a></h1>
 <div class="description"></div>
 </div>
 </div>
 <hr />
This makes the whole header clickable.
Changing WordPress Theme Images
When you were designing the blog, you made a copy of the “default” theme and have customized the files inside that new theme folder that you called “custom”. Now, if you want to change all the images used in the default theme “kubrick”, you should make another copy of the “default” theme in the themes folder and name it “new”. Upload it to your server. Now login to your blog’s admin area and go to “Presentation” section.
You’ll see that now there are a total of 3 “Wordpress Default 1.5” themes installed. Pick one after another until you see a message next to your chosen theme that says:
“All of this theme’s files are located in wp-content/themes/new”
When you see this message, which means you’ve installed and chosen your “new” theme to edit. Log-out and go back to the themes “new” folder in your website that you’ve recently created. Go to “images” folder. Look at each picture presented there. Now you can use such tools as PhotoPlus 6 and simply colorize the images already given.
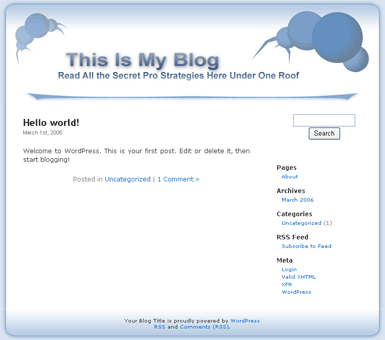
You can open an image, draw a red rectangle and lower the opacity to 13%. This will change the color slightly. You can do so with all the images in the “images” folder and resave your made images. Then upload everything to your server and see the results. You can also spend more time using this free image editing and graphic creation tool and create your won web graphics, including header images. With some imagination and little work, you can come up with something like this:


Of course if you spend some time learning how to use free graphics creation tool, you can create much better images. As a matter of fact, you can create totally new images and use them instead of the given ones. One thing to keep in mind is that the size of the image (width and height) should be the same as in the given pictures. Otherwise, you’d have to edit CSS files of the theme and change size of different tables in the blog.
In Conclusion
WordPress blog software already gives you a few templates to use on your blog. However, if you want to have a long-term strategy you should personalize and make your blog unique. One of the easiest methods to do that is by adding your own images (header graphics) to the blog.
Of course, this is just to show you that it’s possible to have custom made images on your blog, because unique look is always better than something that everyone else is using. If you like designing or think you’ll have time to do this task, then do so. But if you’re busy marketer, or want to create blog and focus on other, more important things, like creating content or marketing the blog, then simply get some WordPress templates on the web for free or hire someone to design the blog for you.

